 English
 Français
 عربى
عربى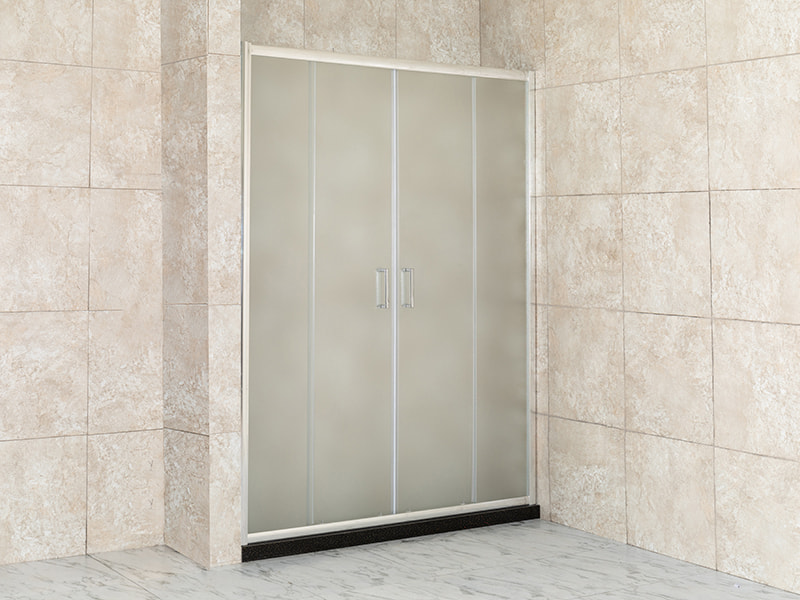
Product Consultation
Your email address will not be published. Required fields are marked *
Introduction
Glass shower enclosures have become a centerpiece of modern bathroom design, offering a sleek, open, and luxurious look that instantly elevates any space. Unlike traditional shower curtains or outdated framed units, today’s glass shower doors provide a seamless blend of function and style. Homeowners increasingly view their bathrooms not only as functional spaces but also as sanctuaries for relaxation and rejuvenation. A well-chosen glass shower enclosure helps achieve this balance by combining durability, easy maintenance, and timeless elegance.
One of the greatest advantages of glass shower enclosures is their aesthetic appeal. Clear or lightly frosted glass creates the illusion of a larger bathroom, making even small spaces feel open and airy. They also showcase tile work, stone walls, or high-end fixtures, allowing design investments to remain visible rather than hidden behind curtains or opaque partitions.
Another key benefit is ease of maintenance. Unlike fabric curtains that can collect mold or plastic liners that discolor over time, glass enclosures can be quickly wiped clean with a squeegee. With the right protective coatings and routine care, homeowners can prevent soap scum buildup and hard water stains, keeping the enclosure sparkling for years.
Finally, glass shower enclosures often add resale value to a home. Prospective buyers perceive them as a premium feature that enhances both design and functionality. For anyone considering a bathroom renovation, investing in a quality glass shower enclosure is not just about comfort today—it’s also a long-term investment in property value.
With so many styles and configurations available, choosing the right enclosure can feel overwhelming. In this guide, we’ll break down the most popular types of glass shower enclosures, discuss glass options, explore hardware finishes, and provide expert tips for installation, maintenance, and design inspiration. Let’s start by exploring the different styles of enclosures you can choose from.
Types of Glass Shower Enclosures
When selecting a glass shower enclosure, the style is the first and most important decision. The right choice depends on your bathroom layout, personal preferences, and budget. Below are the most common types of shower enclosures, each with unique features, pros, and cons.
1. Framed vs. Frameless Shower Enclosures
Framed shower enclosures feature metal supports around the glass panels, typically in finishes like chrome, brushed nickel, or oil-rubbed bronze. The frame provides structural strength, making these enclosures more affordable and slightly easier to install than frameless designs. They also tend to seal more tightly, reducing the risk of leaks. However, the presence of visible metal trim can make the design feel more traditional, and frames require regular cleaning to prevent soap scum or mildew from collecting in crevices.
Frameless shower enclosures, on the other hand, use heavy-duty tempered glass panels without bulky frames. Minimal metal clips or hinges hold the panels in place, resulting in a clean, modern look that emphasizes openness. Frameless designs are highly sought after in luxury bathroom renovations because they maximize visibility and allow custom tilework to shine. While they typically cost more than framed enclosures and may require professional installation, they deliver a high-end, spa-like atmosphere that many homeowners desire.
Which is best?
Choose a framed enclosure if you’re working with a tighter budget or want maximum water containment.
Choose a frameless enclosure if you prioritize aesthetics, openness, and long-term resale value.
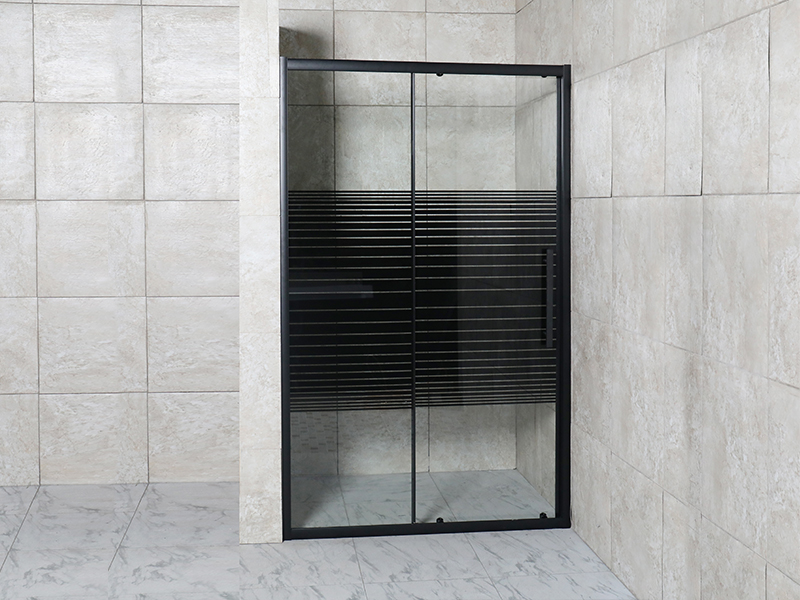
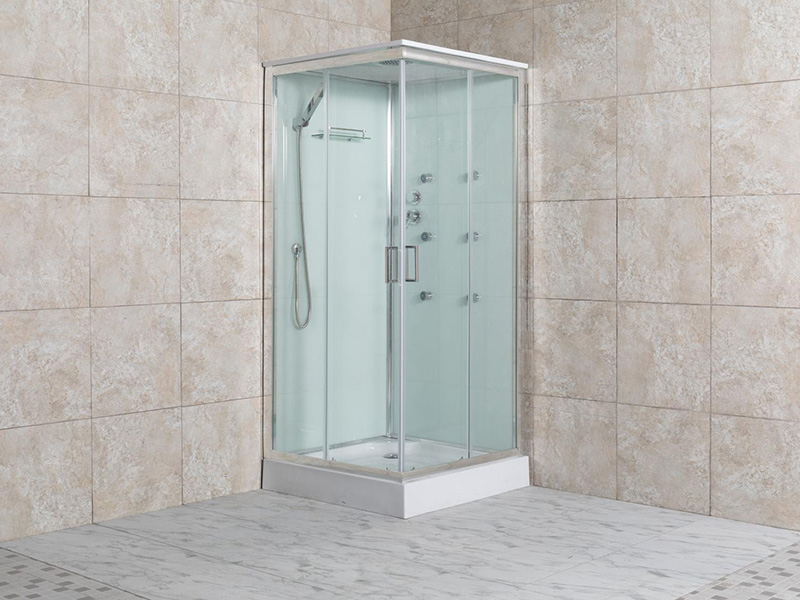
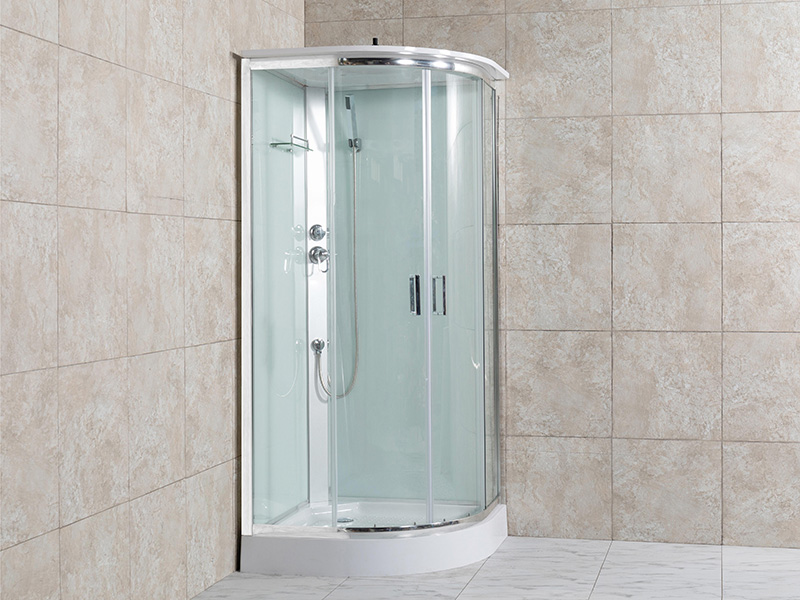
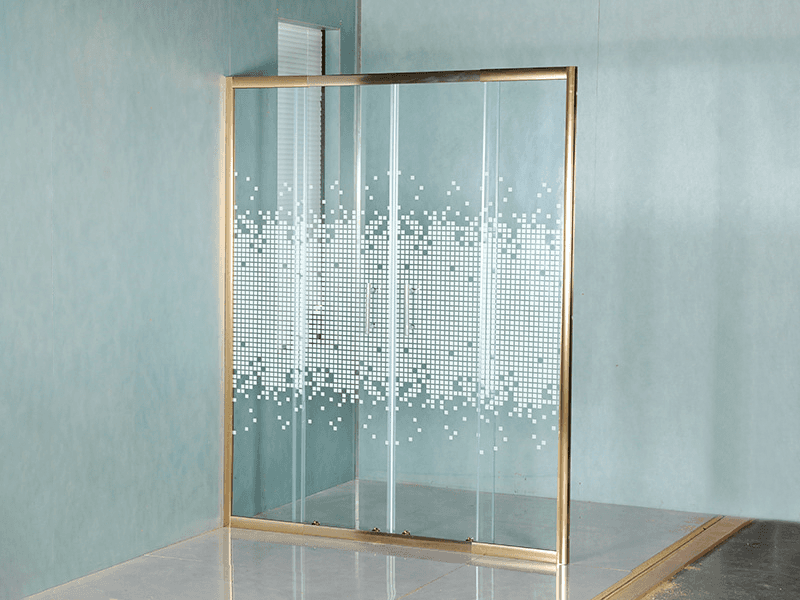
2. Sliding vs. Hinged Shower Doors
Another important decision is how the shower doors will open. This choice depends heavily on your bathroom’s size and layout.
Sliding shower doors, sometimes called bypass doors, consist of two or more glass panels that slide past each other along a track. They are ideal for smaller bathrooms where there isn’t enough space for doors to swing open. Sliding doors work especially well with bathtub-shower combinations or wide shower openings. However, the track system requires periodic cleaning to prevent dirt buildup, and the opening may be narrower compared to hinged doors.
Hinged shower doors swing open like a traditional door, either inward, outward, or both. They provide a wider entry space and a more elegant appearance. Hinged doors are particularly popular in frameless designs, where pivot hinges allow for a clean, uninterrupted glass surface. The downside is that they require clearance space in the bathroom, which may not be practical in compact layouts.
Which is best?
Go for sliding doors in tight bathrooms or for tub-to-shower conversions.
Opt for hinged doors if you want a sophisticated, frameless look and have enough clearance space.
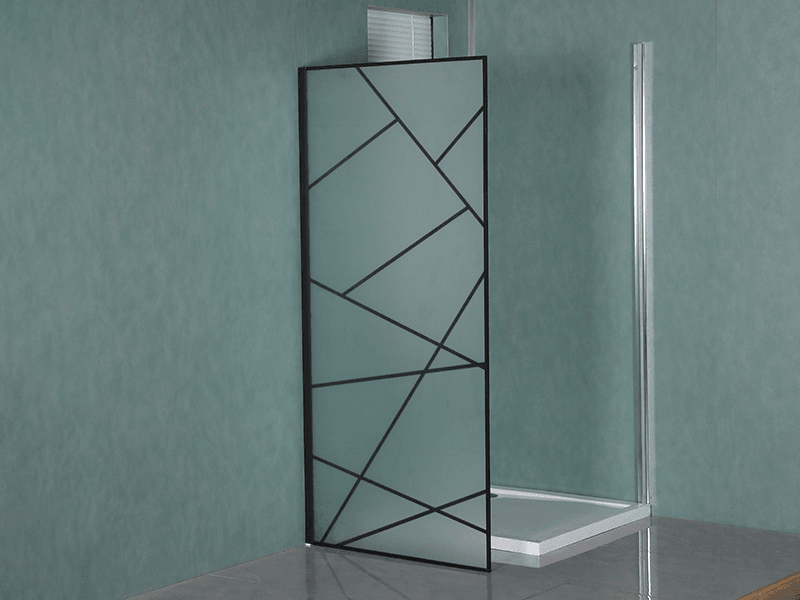
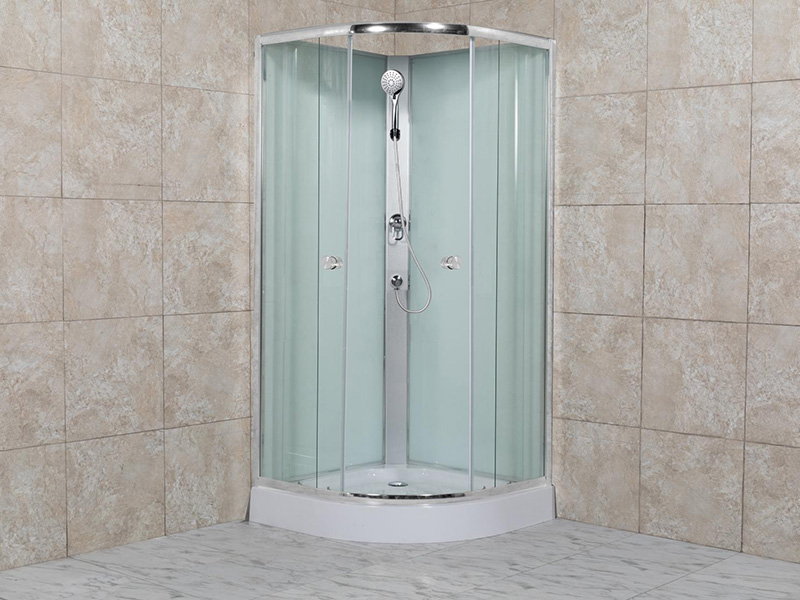
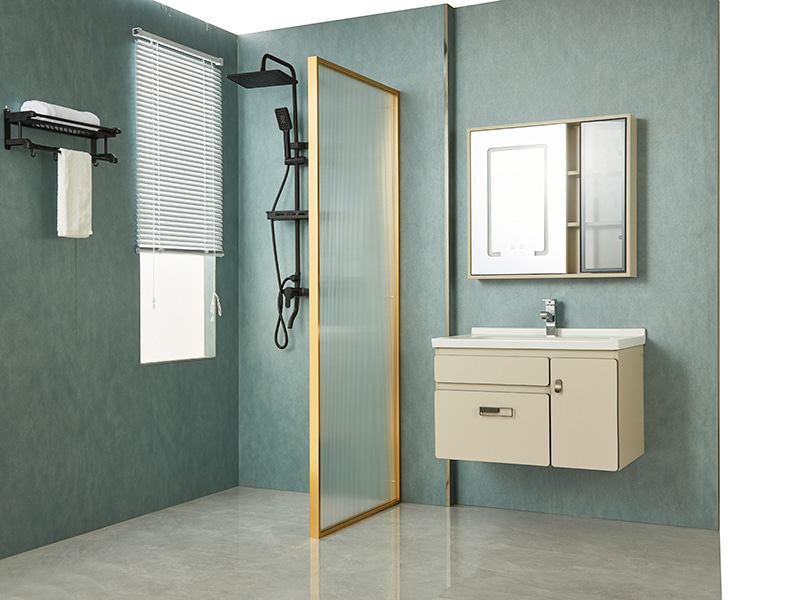
3. Walk-In Shower Enclosures
Walk-in showers, also known as open or barrier-free showers, are becoming a hallmark of modern bathroom design. These enclosures typically consist of a single fixed glass panel that partially encloses the shower area while leaving one side open for entry.
The biggest advantage of walk-in showers is accessibility. With no door to open and often no threshold, they are perfect for universal design and aging-in-place renovations. They also create a sleek, minimalist appearance, making bathrooms feel larger and less cluttered.
However, walk-in showers require careful planning. Since there is no door, proper drainage and water control are essential to prevent splashing. They may not be suitable for very small bathrooms, but when designed correctly, they offer unmatched convenience and style.
4. Neo-Angle Shower Enclosures
For bathrooms with limited space, especially in corners, neo-angle shower enclosures provide a clever solution. These enclosures are designed with three glass panels that form a diamond-like shape, with the door set at a 45-degree angle.
Neo-angle designs maximize floor space while providing a fully enclosed shower. They are ideal for guest bathrooms, basement bathrooms, or powder rooms where space is at a premium. Despite their compact footprint, they don’t sacrifice style—frameless neo-angle enclosures, in particular, can make a small bathroom feel much larger and more elegant.
The tradeoff is that neo-angle showers may not provide as much elbow room as rectangular enclosures. They are best suited for smaller bathrooms where efficiency is more important than expansive space.
5. Custom Glass Shower Enclosures
For homeowners seeking a truly personalized solution, custom glass shower enclosures offer endless possibilities. With custom designs, you can tailor every detail, from the glass type and thickness to the shape, door style, and hardware finish. This option is ideal for bathrooms with unusual layouts, sloped ceilings, or design themes that call for something unique.
Custom enclosures allow for features like oversized panels, steam-tight seals, or etched patterns for added privacy and style. While they are typically more expensive and require professional installation, custom designs ensure that your shower enclosure perfectly complements your bathroom vision.
Wrapping Up the Styles Section
Understanding the different types of glass shower enclosures is the first step in creating your dream bathroom. Whether you prefer the modern elegance of frameless panels, the practicality of sliding doors, or the space-saving efficiency of a neo-angle design, there is a solution for every space and budget.
Choosing the Right Glass Type
Once you’ve settled on the style of shower enclosure, the next step is selecting the type of glass. The glass not only determines the safety and durability of the enclosure but also plays a major role in how your bathroom looks and feels. Different glass options offer varying levels of privacy, clarity, and design character. Below are the most common choices and what you should know about each.
Tempered Glass: Safety as a Standard
When it comes to shower enclosures, tempered glass is the industry standard. Unlike regular glass, tempered glass undergoes a heat treatment process that makes it four to five times stronger. If it ever breaks, it shatters into small, rounded pieces rather than sharp shards, significantly reducing the risk of injury.
For this reason, tempered glass is required by most building codes for bathroom use. Beyond safety, its strength allows manufacturers to produce larger panels and frameless designs without compromising stability. Whether you’re choosing clear, frosted, or patterned glass, make sure it’s tempered—it’s the foundation of a safe and reliable shower enclosure.
Clear Glass: Bright and Spacious
Clear glass is the most popular choice for modern bathrooms. It creates a clean, minimalist look that makes small bathrooms feel larger and allows natural and artificial light to flow freely. Clear glass also showcases tile work, stone walls, and high-end fixtures, ensuring your bathroom design isn’t hidden behind opaque barriers.
However, the transparency of clear glass comes with a tradeoff—maintenance. Water spots, soap scum, and fingerprints are more noticeable, meaning you’ll need to clean it regularly with a squeegee and mild cleaner. If you love the sleek and open aesthetic, clear glass is worth the effort, but consider adding a protective coating to reduce buildup.
Frosted Glass: Privacy with Style
For those who value privacy, frosted glass is a practical yet stylish option. Created by sandblasting or acid-etching one or both sides of the panel, frosted glass diffuses light while obscuring visibility. This makes it perfect for shared bathrooms where multiple people may need to use the space simultaneously.
Frosted glass also hides water stains and streaks better than clear glass, making it lower-maintenance. The tradeoff is that it can slightly darken the shower space and may not highlight decorative tile as effectively. Still, it offers a nice balance between privacy and aesthetics, especially in family bathrooms.
Rain Glass: Textured Elegance
Rain glass features a patterned texture that resembles cascading raindrops. It’s both decorative and functional, providing privacy while still allowing light to pass through. Rain glass is popular among homeowners who want something more visually interesting than frosted glass but less transparent than clear panels.
The textured surface also helps disguise fingerprints and water spots, reducing cleaning frequency. However, depending on the pattern, it may be harder to match with certain bathroom styles, especially ultra-modern designs that favor minimalism.
Low-Iron Glass: True Clarity
Standard clear glass often has a slight greenish tint due to the iron content in the glass. While this isn’t noticeable in small panels, it can affect the appearance of larger shower enclosures, especially when paired with light-colored tile.
Low-iron glass eliminates this green tint, providing crystal-clear visibility and allowing colors behind the glass to remain true. This makes it the ultimate choice for bathrooms with white marble, light ceramic tile, or custom stonework. The downside is that low-iron glass is more expensive than standard clear glass, but many homeowners consider it a worthwhile upgrade for luxury bathrooms.
Summary of Glass Options
Tempered Glass: The safest, most durable option—always recommended.
Clear Glass: Modern and spacious, but requires frequent cleaning.
Frosted Glass: Privacy-friendly and low-maintenance.
Rain Glass: Decorative and textured, great for style and privacy.
Low-Iron Glass: Ultra-clear for showcasing light colors and high-end finishes.
Hardware and Finishes
While the glass is the star of the show, the hardware—handles, hinges, and framing—plays a critical supporting role. Hardware not only secures the panels but also defines the style of the enclosure. Choosing the right finish and design ensures that your shower complements the rest of your bathroom.
Metal Finishes: The Details That Matter
Metal finishes give the shower its personality. Today’s most popular finishes include:
Chrome: Timeless, highly reflective, and versatile. Chrome pairs well with virtually any bathroom design, from traditional to modern. It’s also durable and relatively easy to clean, though fingerprints can be noticeable.
Brushed Nickel: With a soft, matte texture, brushed nickel offers a more subdued look than chrome. It resists water spots and fingerprints, making it a low-maintenance choice. Brushed nickel works well in contemporary and transitional bathrooms.
Oil-Rubbed Bronze: Dark, rich, and dramatic, oil-rubbed bronze adds warmth and contrast. It’s perfect for rustic, vintage, or industrial-inspired bathrooms. While striking, it requires more specific design coordination to ensure the finish matches faucets, lighting, and other fixtures.
When selecting a finish, consider consistency—match your shower hardware with your sink faucets, towel bars, and cabinet handles for a cohesive look.
Handle Styles: Functional Meets Decorative
Handles are more than just practical—they contribute to the overall aesthetic. Common styles include:
Bar Handles: Sleek and minimal, bar handles are popular for frameless enclosures. They double as towel bars in some designs, offering functionality.
Knob Handles: Compact and simple, knobs are often found on smaller enclosures. They’re practical for space-saving setups.
Decorative Handles: From curved shapes to textured grips, decorative handles add personality and elegance, particularly in custom designs.
The choice often comes down to personal preference and how you use your shower. For families, bar handles may be more practical, while decorative handles can enhance a luxury master bath.
Hinge Types: The Mechanics of Style
Hinges determine how your shower door opens and how seamless the enclosure looks. Popular options include:
Standard Hinges: Mounted on the side, these are simple and functional. They can be concealed or visible depending on the style.
Pivot Hinges: Allow the door to swing both inward and outward, ideal for frameless designs. They also distribute the door’s weight evenly, reducing strain on the glass.
Continuous Hinges (Piano Hinges): Run the full length of the door, providing maximum support and a clean appearance.
The hinge style you choose will depend on the door type (sliding vs. hinged) and whether you want a more traditional or minimalist look.
Wrapping Up Glass and Hardware
Selecting the right glass and hardware for your shower enclosure is about finding the perfect balance between style, function, and budget. Clear and low-iron glass are ideal for showcasing design elements, while frosted or rain glass offer more privacy. Pair these with hardware finishes like chrome for a classic look, brushed nickel for understated elegance, or oil-rubbed bronze for bold contrast.
Ultimately, every detail—from the glass clarity to the hinge style—contributes to the atmosphere of your bathroom. Investing in the right combination ensures your shower enclosure not only looks stunning but also performs well for years to come.
Installation Guide
Installing a glass shower enclosure is one of the most transformative steps in a bathroom renovation. Whether you choose to hire a professional or attempt a DIY installation, the process requires precision, patience, and the right tools. Unlike a simple shower curtain, glass panels are heavy, fragile, and require exact alignment to function correctly and prevent leaks. In this section, we’ll walk through the key considerations, step-by-step instructions, and tips for ensuring your shower enclosure is installed safely and securely.
Measuring Your Space: Accuracy Is Everything
The foundation of a successful shower enclosure installation is accurate measurement. Even a small miscalculation of a quarter-inch can cause issues with fitting, alignment, and sealing. Here’s how to do it properly:
Measure Width and Height
Measure the width of the shower opening at three points: top, middle, and bottom.
Record the smallest measurement—this will ensure the enclosure fits snugly.
Measure the height from the base to where the enclosure will end, usually between 72–80 inches, depending on the design.
Check for Level and Plumb Surfaces
Use a level to check if your shower walls are perfectly vertical (plumb) and your base is perfectly horizontal (level).
Uneven walls may require adjustments or shims during installation, especially for frameless enclosures.
Account for Door Clearance
For hinged doors, measure the swing radius to make sure the door can open fully without hitting vanities, toilets, or towel bars.
For sliding doors, ensure you have enough width for the panels to bypass each other.
Double-Check Before Ordering
Always confirm measurements with the manufacturer’s specifications. Brands like DreamLine and Kohler provide detailed measurement guides for each model.
DIY vs. Professional Installation
Before diving into installation, decide whether to do it yourself or hire a professional.
DIY Installation
Pros:
Saves labor costs (typically $300–$600 depending on region).
Offers a sense of accomplishment.
Suitable for handy homeowners with some renovation experience.
Cons:
Heavy glass panels (often 70–100 lbs each) can be difficult to maneuver alone.
Mistakes in measuring, drilling, or sealing can lead to costly leaks.
Some warranties may only apply if a professional installs the enclosure.
Professional Installation
Pros:
Ensures proper alignment, sealing, and safety.
Faster completion (often just a few hours).
Protects your investment—professional installers are experienced in handling tempered glass.
Cons:
Higher cost.
Less flexibility for DIY customization.
Recommendation: If you’re installing a standard framed or sliding enclosure, DIY is feasible with the right tools and assistance. For frameless, custom, or oversized panels, professional installation is strongly advised.
Step-by-Step Installation Overview
If you decide to take on the installation yourself, here’s a simplified overview of the process. Exact steps will vary depending on the manufacturer and enclosure type.
1. Preparing the Shower Base
Ensure the shower base or floor is level, clean, and dry. Any unevenness can affect alignment and sealing.
Check that the walls are finished with waterproof materials such as tile, stone, or acrylic panels.
If installing a neo-angle or walk-in shower, confirm that the drain is correctly positioned to handle water flow.
2. Installing the Frame (If Applicable)
For framed or semi-frameless enclosures, start by attaching the metal frame to the shower walls.
Drill pilot holes with a masonry bit if drilling into tile. Use wall anchors or screws provided by the manufacturer.
Apply a bead of silicone sealant behind the frame before securing it to prevent leaks.
Double-check that the frame is square and plumb before tightening screws fully.
3. Hanging the Glass Panels
With a helper, carefully lift the glass panels into position. Never set tempered glass directly on tile or concrete—use rubber pads or cardboard to protect the edges.
For frameless designs, attach the panels using clips or hinges, ensuring they align properly.
For sliding doors, insert the rollers into the top track and adjust tension as needed for smooth movement.
Temporarily secure panels with painter’s tape until all hardware is tightened.
4. Sealing the Enclosure
Apply a continuous bead of clear silicone caulk along the inside edges of the enclosure where the glass meets the wall and base.
Avoid caulking the inside bottom seam, as this can trap water—only caulk the exterior seam.
Allow silicone to cure for at least 24 hours before using the shower.
5. Final Adjustments
Test the doors to ensure they open and close smoothly. Adjust hinges or rollers if needed.
Check alignment—gaps should be even, and doors should sit flush with the frame.
Wipe down the glass and hardware to remove fingerprints and installation residue.
Safety Tips During Installation
Always wear gloves and safety glasses when handling glass.
Never lean glass panels against hard surfaces at sharp angles—they can crack from pressure points.
Lift panels vertically with suction cups designed for glass handling.
Have at least one helper when lifting or installing large panels.
Common DIY Mistakes to Avoid
Skipping Measurements: Assuming your walls are square can lead to ill-fitting panels.
Using the Wrong Sealant: Standard caulk won’t adhere properly; always use bathroom-grade silicone.
Overtightening Screws: Can crack the glass or strip anchors. Tighten just enough for stability.
Rushing the Cure Time: Using the shower before silicone fully cures can cause leaks.

Tools You’ll Need for DIY Installation
Tape measure
Carpenter’s level
Power drill with masonry bit (for tile)
Screwdriver set
Silicone sealant and caulk gun
Rubber mallet (for gentle adjustments)
Suction cups (for glass handling)
Painter’s tape
Safety gloves and goggles
When to Call a Professional
Even the most experienced DIY enthusiast may encounter situations where professional help is the better choice. Consider hiring an installer if:
You’re working with frameless custom glass.
The panels are oversized (over 80 inches tall or extra wide).
Your bathroom walls are significantly uneven.
You want a warranty-backed installation.
Companies like Glass Warehouse and Vigo often recommend professional installation for their premium frameless models to ensure safety and performance.
Wrapping Up Installation
Installing a glass shower enclosure is a rewarding project that adds beauty and functionality to your bathroom. Accurate measurements, careful handling, and attention to sealing are critical for success. While DIY installation is possible for standard units, frameless and custom designs are best left to professionals.
By taking the time to prepare properly and avoid common mistakes, you can ensure your enclosure not only looks stunning but also lasts for years without issues.
Cost Considerations
One of the most important factors in choosing a glass shower enclosure is cost. While these enclosures bring elegance and functionality to a bathroom, their prices can vary widely depending on the type of glass, size, hardware, and installation method. Understanding what drives these costs will help you budget realistically and identify where you can save without compromising quality.
Factors Affecting Cost
Several elements determine the total price of a glass shower enclosure.
Type of Enclosure
Framed Enclosures: Typically the most affordable option, since the frame provides structural support, allowing manufacturers to use thinner glass. Prices are usually lower, but design flexibility is limited.
Frameless Enclosures: Require thicker glass and precision hardware, making them more expensive. The sleek, modern look adds value but also increases cost.
Custom Enclosures: The most expensive option, since they are built to fit unusual layouts or specific design requests. Custom glass cutting, etching, and hardware all add to the price.
Glass Type and Thickness
Standard tempered clear glass is the baseline.
Upgrades such as frosted, rain, or low-iron glass increase the price due to additional processing.
Thicker glass (3/8" or 1/2") costs more than thinner options (1/4"), but it’s essential for frameless designs.
Hardware and Finish
Hardware choices—handles, hinges, rollers—add significantly to cost.
Basic chrome finishes are affordable, while brushed nickel and oil-rubbed bronze are mid-range to premium options.
High-end hardware brands such as Delta or Kohler often charge more but provide superior durability.
Size of the Shower
Larger enclosures with oversized panels naturally cost more due to the glass and hardware required.
A small neo-angle unit will be cheaper than a floor-to-ceiling frameless walk-in.
Installation Method
DIY installation saves on labor but requires tools, materials, and time.
Professional installation adds $300–$800 on average but guarantees correct fitting and sealing.
Some manufacturers, such as DreamLine and Glass Warehouse, recommend professional installation to maintain warranty coverage.
Additional Features
Protective coatings to reduce soap scum and water stains.
Steam-tight seals for steam showers.
Custom etched or patterned designs.
Average Price Ranges
To help you estimate, here are the typical costs for different types of glass shower enclosures (excluding labor unless noted):
Framed Shower Enclosures: $400–$900
Budget-friendly option, especially for standard sliding or hinged models.
Semi-Frameless Enclosures: $700–$1,200
A good balance between cost and modern style, with minimal framing.
Frameless Shower Enclosures: $900–$2,500
Higher-end choice, offering luxury appeal and thicker glass. Prices vary based on size and glass type.
Custom Enclosures: $1,500–$5,000+
Tailored to unique layouts, materials, and finishes. Labor costs are usually higher for custom projects.
Professional Installation: $300–$800
For complex frameless or custom enclosures, installation can cost $1,000 or more.
Total Project Cost (Enclosure + Installation):
Budget Range: $700–$1,500
Mid-Range: $1,500–$3,000
Luxury Range: $3,000–$6,000+
Cost-Saving Tips
Fortunately, there are ways to reduce the overall expense while still enjoying the benefits of a glass shower enclosure.
Choose a Standard Size
Stock sizes are much cheaper than custom orders. If your bathroom layout allows, design around a standard size rather than requesting modifications.
Opt for Semi-Frameless Instead of Frameless
Semi-frameless enclosures still deliver a sleek look without the full cost of heavy glass panels.
Stick with Clear Tempered Glass
Decorative or low-iron glass looks stunning but can increase costs by 20–40%. Standard clear glass with a protective coating offers good value.
Select Chrome Hardware
Chrome is not only affordable but also durable and widely available. You can coordinate it with other bathroom fixtures easily.
Consider DIY Installation for Simpler Units
Sliding or framed enclosures are more DIY-friendly. If you’re confident in your skills and have help, you can save several hundred dollars.
Buy from Reputable Mid-Tier Brands
Brands like DreamLine and Vigo offer stylish, high-quality enclosures at lower prices than luxury names like Kohler. They often include everything you need in one kit.
Look for Package Deals
Some retailers offer bundles that include the base, walls, and glass enclosure. Purchasing as a package is usually cheaper than buying separately.
Avoid Unnecessary Add-Ons
Skip features like custom etching or rare finishes unless they’re essential to your design vision.
Value vs. Expense: Why a Glass Shower Is Worth It
While the upfront cost may seem high compared to a shower curtain or basic acrylic door, a glass shower enclosure offers long-term value. Benefits include:
Durability: With proper care, a quality enclosure can last decades.
Increased Home Value: Homes with updated bathrooms featuring glass showers are more attractive to buyers.
Improved Aesthetics: A stylish shower enclosure transforms the bathroom into a spa-like retreat.
Low Maintenance: With protective coatings and regular cleaning, maintenance costs are minimal.
A survey by real estate professionals shows that bathroom renovations deliver some of the highest returns on investment (ROI), often recovering 60–70% of costs at resale. Glass enclosures, being both practical and luxurious, play a major role in that ROI.
Brand-Specific Pricing Examples
DreamLine: Known for affordable yet stylish enclosures. Standard sliding or frameless units often fall between $700–$1,500.
Kohler: Premium brand with elegant finishes and innovative designs. Frameless models typically start at $1,500–$2,500, with custom options going higher.
Vigo: Mid-range pricing with a focus on frameless contemporary styles. Expect to pay $900–$1,800 for most units.
Glass Warehouse: Offers both semi-frameless and frameless options with thicker glass, ranging $1,200–$2,500.
Delta: Known for dependable, easy-to-install enclosures, usually priced in the $600–$1,200 range.
These examples show that homeowners have options across the price spectrum, from budget-friendly framed models to custom luxury enclosures.
Wrapping Up Costs
Budgeting for a glass shower enclosure is about balancing your desired style with practical financial considerations. While frameless and custom options command higher prices, there are affordable alternatives that still offer elegance and durability. By understanding the factors that influence cost and applying smart strategies—such as choosing standard sizes, chrome finishes, and reliable mid-tier brands—you can achieve a beautiful, functional bathroom without overspending.
Maintenance and Cleaning
A glass shower enclosure is an investment in both functionality and style, but like any high-use feature, it requires consistent care to maintain its brilliance. While glass is durable, it is not immune to common bathroom challenges such as soap scum, hard water stains, and mold growth. The good news is that with the right cleaning routine and preventive measures, your shower enclosure can remain sparkling clear for many years.
Daily Cleaning: The Quick Habit That Saves Time
The single best way to reduce cleaning time and extend the life of your glass is by adopting a daily squeegee routine.
Use a Squeegee After Each Shower
Every time you finish showering, run a squeegee down the glass panels. This simple step removes most of the water droplets that would otherwise dry into mineral spots or soap residue. Over time, these spots create cloudy buildup that is harder to clean.
Wipe the Hardware and Frame
Use a microfiber cloth to quickly dry handles, hinges, and frames. This prevents water spots and reduces the risk of corrosion, especially on finishes like oil-rubbed bronze.
Ventilate the Bathroom
Open a window, switch on the exhaust fan, or leave the door ajar to reduce humidity. Proper airflow prevents mold and mildew from forming in the corners or along the caulk lines.
Pro Tip: Keep a squeegee with a suction hook inside the shower so it’s always within reach. Brands like Vigo even sell enclosures with matching accessories, making it easy to coordinate.
Weekly Cleaning: Dealing with Soap Scum and Water Spots
Even with daily squeegee use, your shower enclosure will eventually accumulate residue. A once-a-week cleaning session is the key to keeping glass crystal clear.
Soap Scum Removal
Soap scum is caused by a chemical reaction between bar soap and hard water minerals. It leaves behind a filmy residue that dulls the glass.
Use a vinegar-water solution (equal parts distilled white vinegar and warm water) sprayed directly onto the glass. Let it sit for 5–10 minutes, then wipe clean with a microfiber cloth.
For stubborn scum, mix baking soda with a small amount of water to create a paste. Apply it with a non-abrasive sponge, then rinse thoroughly.
Hard Water Stains
Hard water leaves behind calcium and magnesium deposits that create cloudy spots.
A vinegar soak usually works, but for tough stains, use a cleaner formulated for mineral deposits, such as Lime-A-Way or CLR.
Always rinse thoroughly and avoid harsh scrubbing tools that can scratch tempered glass.
Glass Coating Maintenance
Many modern enclosures from brands like DreamLine or Glass Warehouse include protective coatings that resist water spots. Check the manufacturer’s recommendations—some coatings require reapplication every few years to maintain effectiveness.
Frame and Hardware Cleaning
Use mild dish soap and water to wipe down metal finishes.
Avoid abrasive cleaners, which can strip protective coatings or dull brushed nickel and chrome.
For oil-rubbed bronze, stick with gentle, pH-neutral products to prevent discoloration.
Recommended Cleaning Products
Using the right products ensures effective cleaning without damaging the glass or hardware. Here are safe and proven options:
For Daily Use:
Plain water and a squeegee.
Microfiber cloths for wiping hardware.
For Weekly Use:
Vinegar-water solution (eco-friendly and inexpensive).
Baking soda paste for scrubbing problem areas.
Glass cleaners like Windex (use sparingly on hardware to avoid residue).
For Stubborn Build-Up:
Lime-A-Way or CLR for hard water stains.
Specialty shower cleaners with anti-spot formulas.
Professional-grade coatings like EnduroShield for long-term protection.
Avoid:
Abrasive scrub pads or steel wool (they scratch tempered glass).
Ammonia or bleach on certain finishes (they can corrode hardware).
Household cleaners with high acidity on protective coatings (they may wear away the finish).
Preventing Mold and Mildew
Mold and mildew thrive in damp environments, particularly around caulk, seals, and door tracks. Here’s how to keep them at bay:
Keep It Dry
After each shower, dry the enclosure as much as possible. Pay attention to corners, tracks, and hinges where water tends to collect.
Improve Ventilation
Run an exhaust fan for at least 15 minutes after each shower. If your bathroom doesn’t have a fan, crack the door or window.
Use Mold-Resistant Caulk
If you’re installing a new enclosure, choose mold-resistant silicone. For older showers, replace any discolored caulk to prevent mold from spreading.
Regular Deep Cleaning
Scrub the tracks and seals with an old toothbrush dipped in vinegar once a month. This removes hidden buildup before it develops into mold.
Long-Term Maintenance Tips
Inspect Seals and Caulk: Check annually for cracks or gaps in silicone seals. Reapply as needed to prevent leaks.
Lubricate Hinges and Rollers: Apply a silicone-based lubricant to keep moving parts functioning smoothly. Avoid petroleum-based oils, which can damage finishes.
Reapply Protective Coatings: If your glass has a factory-applied coating, check whether it needs refreshing. DIY kits are available to restore water-repellent properties.
Check for Hard Water Solutions: If you live in an area with very hard water, consider installing a water softener. This reduces mineral buildup throughout the bathroom.
Troubleshooting Common Cleaning Challenges
Cloudy Glass That Won’t Clear
Likely due to etching from prolonged hard water exposure. If vinegar doesn’t restore clarity, the glass may be permanently etched. Prevent this by consistent maintenance.
Persistent Mold in Tracks
Remove the door if possible and deep-clean the track with a bleach solution (use sparingly). If mold returns quickly, replace the track seal.
Stains on Oil-Rubbed Bronze Hardware
Wipe with a damp microfiber cloth and dry immediately. Apply a thin layer of furniture wax occasionally to preserve the finish.
Why Maintenance Matters
Maintaining a glass shower enclosure is not just about appearance—it’s about preserving functionality and extending lifespan. Neglected enclosures can suffer from:
Permanent etching from mineral deposits.
Corroded or discolored hardware.
Leaks due to deteriorating seals.
Mold growth that compromises hygiene.
By spending a few minutes each day and dedicating an hour each week, you’ll protect your investment and keep your bathroom looking as fresh as the day it was renovated.
Wrapping Up Cleaning and Maintenance
A glass shower enclosure is designed to last for decades, but only if it’s properly maintained. The combination of daily squeegee use, weekly deep cleaning, and long-term preventive measures will keep your glass spotless, your hardware shining, and your shower hygienic.
Conclusion
Glass shower enclosures combine style, functionality, and long-term value, making them a smart investment for any bathroom renovation. From framed to frameless, sliding to walk-in, and custom options, there’s a solution to fit every layout and budget. Choosing the right glass type—whether clear, frosted, rain, or low-iron—ensures the perfect balance of privacy, safety, and design appeal, while hardware finishes like chrome, brushed nickel, and oil-rubbed bronze add the finishing touch.
Proper installation, whether DIY or professional, guarantees performance and durability. Although costs vary depending on size, materials, and labor, homeowners can find affordable yet stylish options from trusted brands such as DreamLine, Kohler, Delta, Glass Warehouse, and Vigo. With daily maintenance like squeegee use and weekly cleaning to combat soap scum and hard water stains, your enclosure will stay crystal clear for years.
Ultimately, a glass shower enclosure transforms the bathroom into a bright, open, and spa-like retreat—enhancing both everyday comfort and home value. For anyone planning a bathroom upgrade, it remains one of the most impactful choices you can make.
Is the Opening Shower Enclosure suitable for home use or for use in hotels and homestays?
How to install a Glass Shower Enclosure?
Your email address will not be published. Required fields are marked *
 Tel: +86 13967167585
 E-mail: [email protected]
Copyright 2023 Anhui D-MAN Smart Home Co., Ltd. All Rights Reserved Shower Enclosures Manufacturers Shower Room Design Custom
